Time for another update on the rosco_m68k, my homebrew retro computer project. As always, regular updates can be found on hackaday, so please do check there for the details (and like/follow if you want to!) – this will be more of a digest of what’s been going on over the past couple months.
The Headline
So I guess the headline thing that’s been happening recently is that I’ve started working toward having a PCB manufactured for this thing. I realised I needed to press on with this after I took the breadboard in to work for a geek-out session with some of my awesome colleagues, and had a totally nerve-wracking commute with the breadboard (it survived, save for one current-limiting resistor which developed a loose connection).
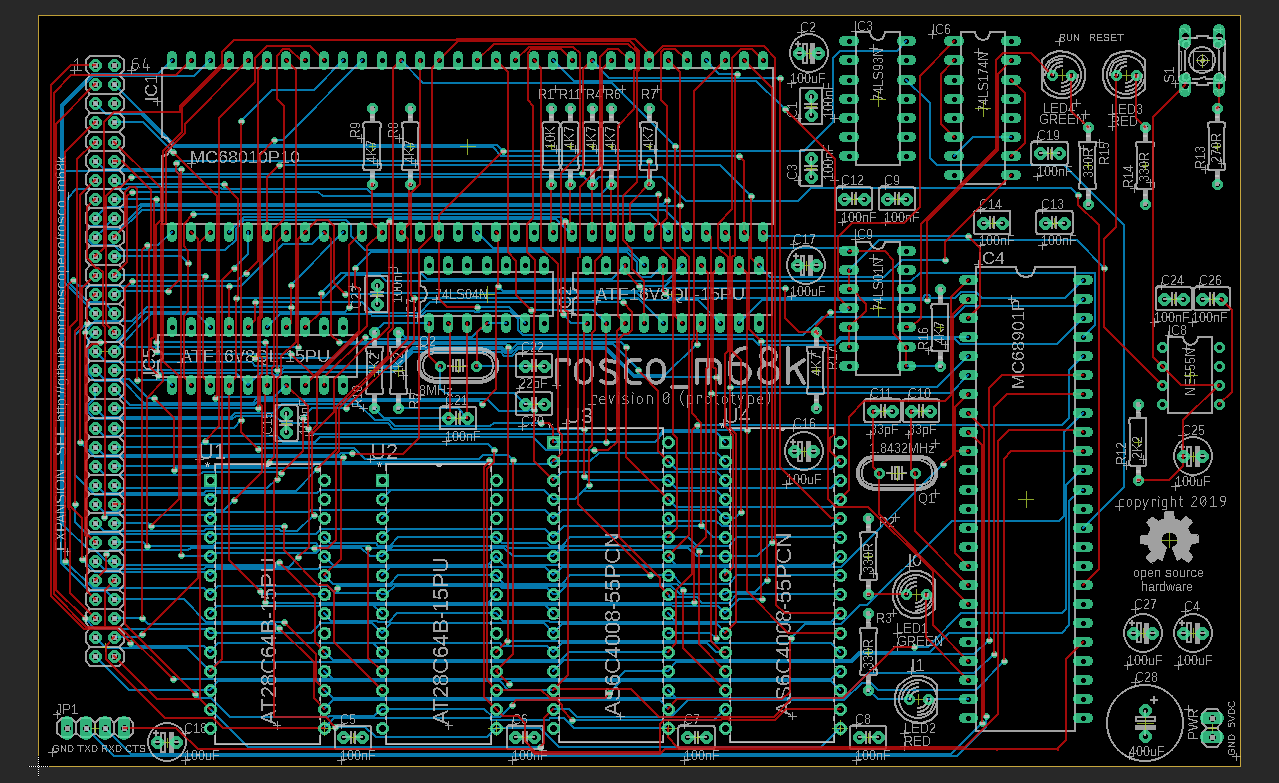
So I started work on reducing the component count (more on that later) and actually designing a PCB. It’s now pretty-much ready to go off to OSHPark for manufacture (Yes, I could get it cheaper but I like purple and, y’know, yield) and looks like this:
So that’s the hot-of-the-press headline (I finished it today), and I’ll update more once the boards are made. In the meantime, if you want more details, follow the project on Hackaday for (usually) weekly updates.
Lowering the component count?
In the original design of this computer, I went for a full 7400-series TTL design for all of the glue logic, and that was cool. I learnt a lot about designing with discreet logic gates, was forced to really think about the way I wanted my circuit to work, came to understand propagation delay in a way I didn’t before, and bought a lot more breadboard. That last point is important – fifteen 7400-series chips, while cool, take up a lot of physical space. And PCB fabs charge by the square inch.
It had been pointed out to me before (thanks, Ken!) that I could do with a couple of programmable logic devices what I was previously doing with ~fifteen discreet logic ICs, so I decided (in the interests of staying sane and solvent) to investigate. After a good bit of reading and learning, I’ve now replaced most of the 7400-series on the board with two ATF16V8QL (link to PDF) CPLDs.
This is a win in more than one respect – not only has it saved me board space but it’s made routing the PCB much easier, cut down the current draw of the board, fixed up some propagation delay issues and allowed me to (finally) fix the bug with the expansion select line. These chips were available at the time the CPU I’m using was released, are still in production today, and cost me around £1 each (delivered, based on 5-off, from Farnell in the UK). They’ve taken over all address decoding and IO glue logic, and I highly recommend them.
What About Software?
Things haven’t stood still on the software front – since my last blog I’ve fully integrated the MC68901, gotten timers and interrupts working, and made the UART work such that the computer can now talk over serial (via a CP2102 Serial-to-USB converter I had lying around). Work on an OS for this thing continues apace, and it already has some basic memory management, a fully async serial driver, and has been demonstrated with some (very) basic multitasking. My immediate plan is to implement a way to load software via serial (Zmodem) in the immediate term to make it so that, as I continue to develop the kernel, I don’t have to physically pull the ROMs to reprogram them.
It’s Going Well, Then?
I like to think it is, yeah. I’m having tons of fun, and this thing is starting to look like a product. Once the PCBs are made and I’ve done some more on the software, I think this thing will be at a point where other people might want one. Obviously it’s a 16/32-bit computer in a 64-bit era, but I kinda feel like it might make a great starting point for people wanting to really get to grips with bare-metal, without all the lies abstractions that modern architectures force on them.
The PCB design gets me to a point where the core computer is done, and the expansion connector I put in means I can continue to develop new bits without worrying about disturbing the ever-so-fragile connections on the existing breadboard. This will mean graphics, networking, and who knows what else.
And even if it never goes anywhere beyond the three prototypes I’m going to be building soon, I’ve learnt a hell of a lot from this project, and continue to do so every time I work on it – and that’s really all that matters, right?
As always, the rosco_m68k is open hardware/open source. The complete set of design, documentation and code can be found on Githib at https://github.com/roscopeco/rosco_m68k.
